Import Shopify data
Import & sync automatically (server)
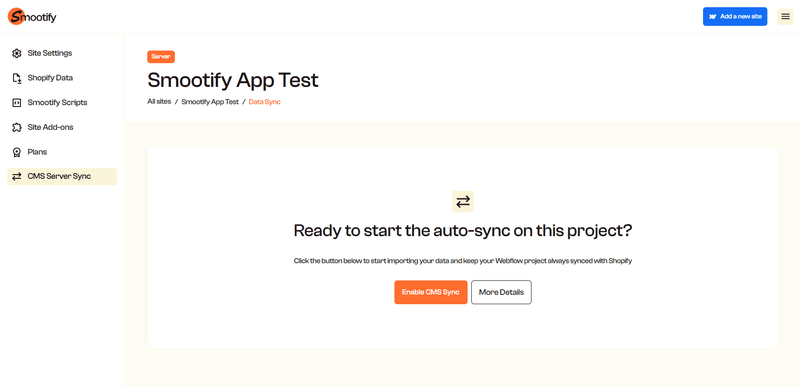
With our new Server Plan, you can keep Webflow and Shopify in perfect sync using the CMS Server Sync feature. If you have an active Server Plan, you’ll find the CMS Server Sync option in the left sidebar. Click on it and then select Enable CMS Sync.
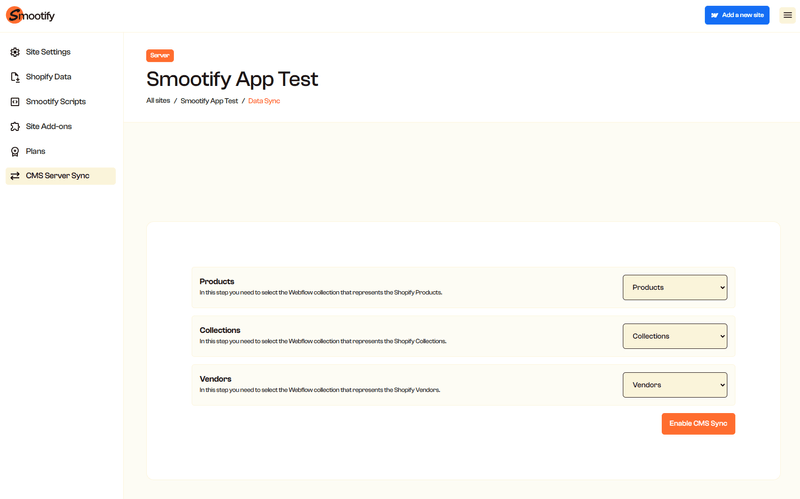
Now, you only need to associate Products, Collections, and Vendors in your Webflow project with their corresponding Shopify counterparts (follow these steps if you haven’t use our Starter Project) and then click Enable CMS Sync.
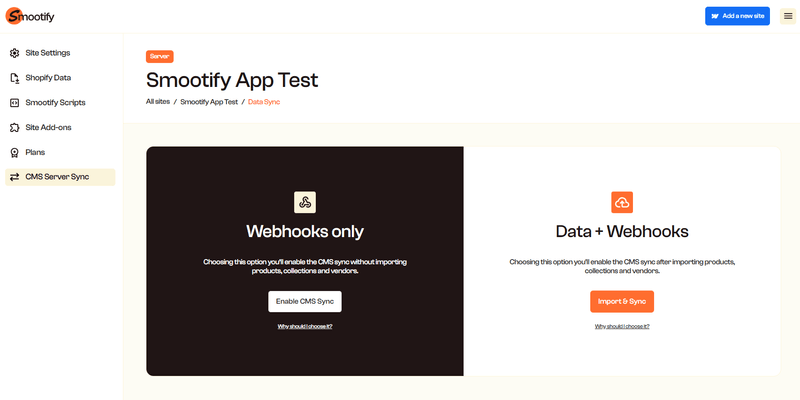
Choose whether to start the synchronization with webhooks only (if you’ve already imported products, collections, and vendors) or to perform an initial Shopify data import and then set up webhooks.
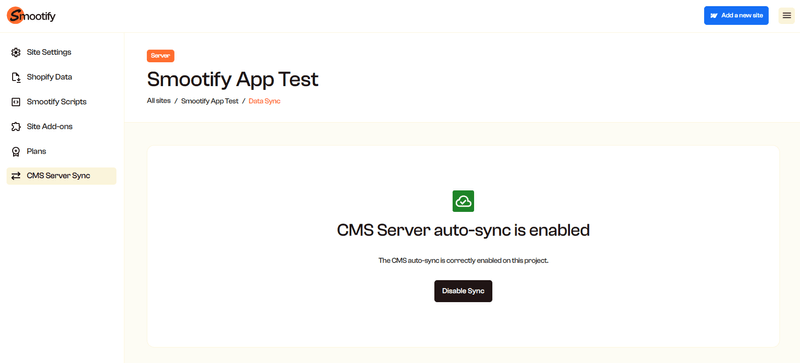
Once the synchronization is complete and enabled, you will see a confirmation message on the dashboard. You can deactivate the synchronization at any time by clicking the Deactivate Sync button.
Import & sync with Desktop App
If you have a Free or Lite plan, you can utilize our free Desktop App. After importing, remember to synchronize the platforms using this app whenever you publish a new item on Shopify and want it reflected on Webflow.
Import data manually
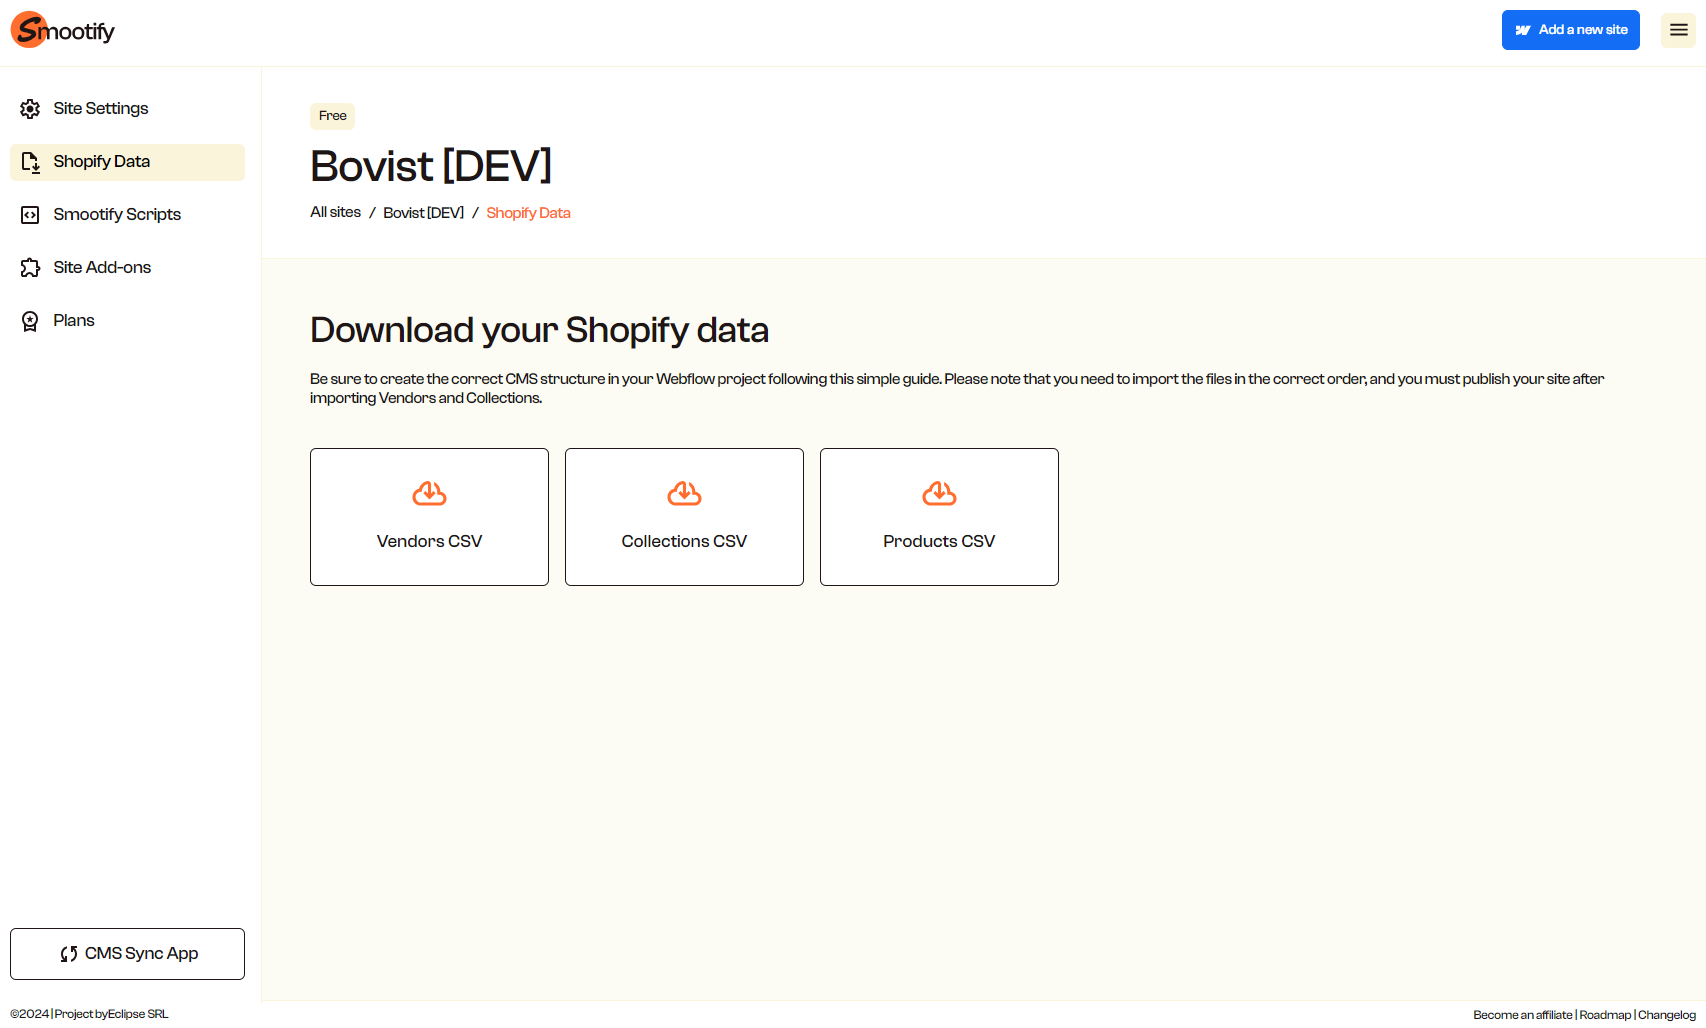
To import all the Shopify data to your Webflow CMS you need to follow these steps.
-
Download all the CSV files from the Smootify Dashboard > Shopify Data (note that you see the downloadable files only if you have correctly connected your Shopify store following this guide).
-
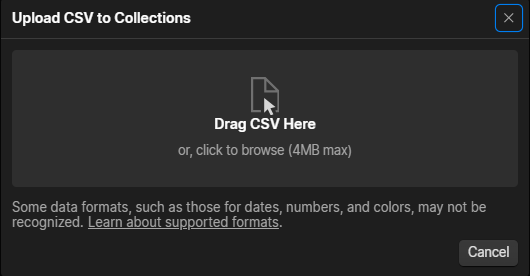
Once done, you have to import them to Webflow with this exact order:
1. Import Vendors CSV;

2. Import Collections CSV;
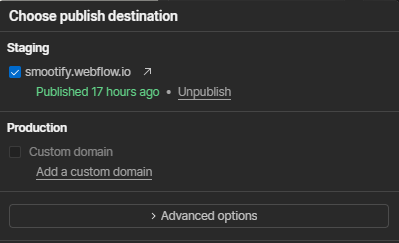
3. Publish the site (this action is required to connect products, vendors and collections);
4. Import Products CSV

5. Publish the site again.