Metafields
Extending your Customer Account's Data
Shopify metafields are a powerful feature that allows you to store custom data associated with your products, variants, collections, customers, orders, and more. They provide a flexible way to add information beyond the standard fields provided by Shopify.
What are Metafields?
Metafields are essentially custom fields that you can create and attach to various Shopify resources. They allow you to store data that's specific to your business and products, enabling you to:
- Add detailed product specifications: Store information like material, dimensions, or technical details that aren't available in standard product fields.
- Enhance product filtering and search: Use metafields to create custom filters and improve search functionality.
- Personalize customer experiences: Store customer preferences or loyalty program information.
- Manage complex product variations: Store specific data for each variant, such as size charts or care instructions.
- Create dynamic content: Display metafield data on your storefront using Liquid or the Storefront API.
- Integrate with third-party apps: Share custom data with other apps and services.
Key Concepts
- Namespace: A namespace is a container for your metafields. It helps organize your metafields and prevent naming conflicts with other apps or custom code. For example,
custom.product_details. - Key: The key is a unique identifier for your metafield within its namespace. For example,
materialorsize. - Value: The value is the actual data stored in your metafield. It can be text, numbers, dates, booleans, or JSON objects.
- Type: The type defines the format of the value. Common types include:
string: Text data.integer: Whole numbers.decimal: Numbers with decimal places.boolean: True or false values.date: Date values.date_time: Date and time values.json: JSON objects.file_reference: References to files stored in Shopify's Files section.product_reference: References to Shopify products.variant_reference: references to shopify variants.
How to create Metafields
You can create metafields in the Shopify admin panel, from Settings > Custom Data > Metafields
When creating a metafield, you'll need to specify the namespace, key, value type, and optionally a description.
Be sure to set the metafield as Visible on storefront, there is a checkbox that you must select at the end of the metafield creation page.
key_casing
Avoid changing the casing of the key that Shopify uses by default. Leave it as snake_case otherwise it will not be neither usable in the store and neither it can be imported into Webflow if necessary
Avoid special chars
Avoid using special chars and non utf-8 chars inside metafields labels otherwise matching could fail
How to render metafields inside Webflow
Without needing any import you can render all your metafields directly on static elements of Webflow. You just need to add the Custom Attribute:
customer-metafieldkey_of_your_metafieldSo for example if you created a metafield with Namespace and Key: custom.my_field you have to add the attribute
customer-metafieldmy_fieldYou can also render metafields outside of the custom namespace, by adding an additional attribute
namespacenamespace_of_the_fieldSo for example if you created a metafield with Namespace and Key: global.my_field you have to add the attributes
customer-metafieldmy_fieldnamespaceglobalYou do not need to specify the type of the metafield. Smootify scripts are smart enough to understand the context of your element and how to render them.
Company Metafields
If you are on Shopify Plus you can also use company metafields with same syntax but by using company-metafield as name instead of customer-metafield
company-metafieldkey_of_your_metafieldSupported Metafields
| Shopify Type | Webflow Elements | Info |
|---|---|---|
Single Line Text | Any text element | Will output the text of the metafield |
Multi Line Text | Any text element | Will output the text of the metafield |
Integer Number | Any text element | Will output the number of the metafield |
Double Number | Any text element | Will output the number of the metafield, the number of digits to output can be customized with the attribute Name data-digits Value 2 |
URL | Any link element | Will output the selected link |
Color | Any element | Will output on the element the CSS variable --metafield-color, unless you use the attribute Name property Value --your-css-variable |
File / Generic File | Any link element | If you select generic file you can output the link of it |
File / Image File | Any link, image and div element | If you use it on a link element the link to the image will be rendered, while on all other elements you will see the image or the background image |
File / Video File | Any div element | Will output a video player of the file |
Date / Date Time | Any text element | Will output the date / date time in the current browser format |
Dimension / Volume / Weight | Any text element | Will output the selected value |
Money | Any text element | Will output the money using the shopify currency format |
True or False | Any element | Will hide/show the element based on that value |
List of Single Line Text | Any text element | Will show all texts concatenated by a comma.You can change the separator by using the attribute Name separator Value , Name separator Value repeat |
List of File / Generic File | Any link element | The link element will be duplicated once for each file, the text content of the link will be the "alt" of the file and the link will be connected to the file link |
List of File / Image File | Any image element | The image element will be duplicated once for each file |
Metaobjects / List of Metaobjects | Any Div Element | The div element you use will be duplicate once for each metaobject inserted in the metafield and inside the metaobject context you created you have to use Name metaobject Value key |
Only for metafields of type Single Line Text you can use an additional attribute:
data-attrattribute-to-modifyThis will ask Smootify to output the value inside the attribute explained in the attribute instead of setting the value as the text of the element.
E.g:
data-attrdata-idWill set the value of the metafield in the attribute data-id of the element.
Metafields Visibility
Learn how to show or hide elements based on whether a metafield exists and what its value is.
To control visibility of an element you have principally 2 custom attributes to use:
if-customer-metafieldmetafield_keyThis attribute will show the element if the metafield exists with 2 exceptions:
-
In the case you used a metafield of type True / False it will be shown if the metafield is set and is set as True;
-
In the case of metafields of type Integer Number, the element will be shown if the metafield is set and the value is higher than 0;
The second custom attribute is:
unless-customer-metafieldmetafield_keyThis attribute will act in the opposite way of the first one, so the element will show only if the metafield doesn't exists.
Check for Value
By default metafields visibility attributes will just check for the existence of the metafield. If you wish instead to check for the value that is inside the metafield add also the attribute:
data-check-valueDesired ValueFor example if you created a metafield of type Single Line Text with key my_option and you want to show an element only when the metafield value is for example Option 1.
You have to use the custom attributes:
if-customer-metafieldmy_optiondata-check-valueOption 1Company metafields visibility
If you are on Shopify Plus you can also use company metafields visibility with same syntax but by using company in the name instead of customer
as example
if-company-metafieldkey_of_your_metafieldHow to create a Customer Metafields Product Listing
Add a Flex or Grid element
Design your flex/grid by keeping in mind that the replication of your product items will only occur on the live website, where your placeholder will be transformed into the full product listing.
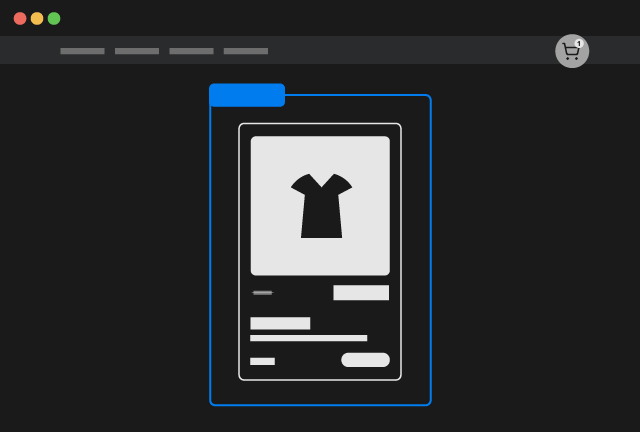
Design the Product Template item
Copy and paste the Product Custom Element inside the flex/grid element you created.
Product Custom Element
Copy Element
Inside the Product Custom Element you can insert any static Webflow element.
For all the dynamic elements you can use inside the Product Custom Element with attributes or with other specific custom elements refer to the elements documentation
Copy and paste any of our pre-made example inside the flex/grid element you created.
Product Card
Copy Element
Naturally you can insert any Webflow element you desire inside the pre-made examples.
For all the dynamic elements you can use inside the Product Custom Element with attributes or with other specific custom elements refer to the elements documentation
Add the data-id attribute
To retrieve the correct data from Shopify, add the necessary data-id attribute.
The required value depends on your query. Refer to the list below for all possible data-id options.
If you need to curate unique product lists for each customers, metafields provide a method for manual selection and assignment.
Shopify metafields are essentially custom data fields that allow you to store additional information within your Shopify store that isn't included in the standard Shopify fields. Metafields can be defined inside Shopify > Settings > Custom Data. To use this feature you have to create a metafield of type Product that allows to select a List of Products.
A metafield is defined by a namespace and a key, that you find directly in Shopify when you create the metafield.
To show up products selected from a metafield you have to add the attribute below to the Product Custom Element
data-idmetafields.namespace.keyFor example if you created the metafield with namespace custom and key my_products you have to add the attribute
data-idmetafields.custom.my_productsAdd the data-parent-id attribute
To retrieve the correct data from Shopify, add the mandatory data-parent-id attribute. The attribute must be customer
data-parent-idcustomer[Optional] Limit the number of products
By default the dynamic queries explained before will fetch 3 products. You can override this limit by adding another custom attribute to the Product Custom Element
limitNumber of ProductsE.g to fetch 10 products you can add:
limit10