Wishlist
Allow shoppers to easily keep track of products they love
A wishlist, also known as a favorites list or saved items, is a digital feature that allows users to curate a collection of products they're interested in purchasing at a later time.
Customer Accounts
Data will be persistent for your Customers only if you are using Customer Accounts. If you are using Legacy Accounts the data will be saved only locally in the browser
All plans
This Add-On is included in all plans.
Activate add-on
This Add-On requires activation. You need to enable the add-on on the Smootify Dashboard of the site you are designing.

How to Setup [Shopify]
Activate the Add-on
To turn on the Wishlist feature, go to your project in the Smootify dashboard and activate it within Sites add-ons.

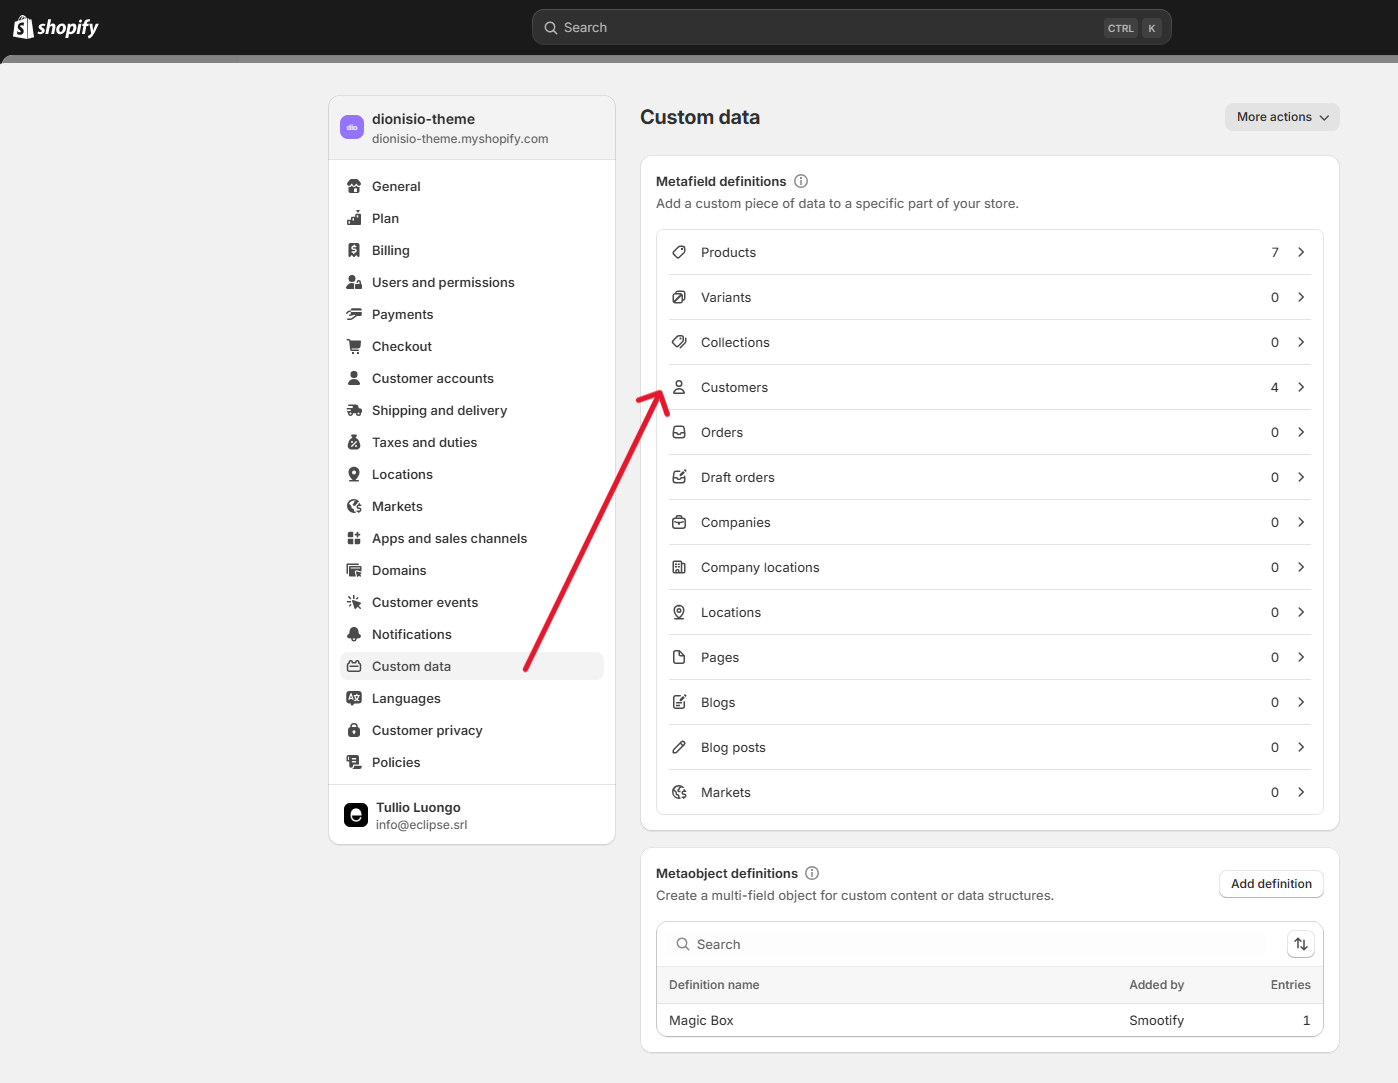
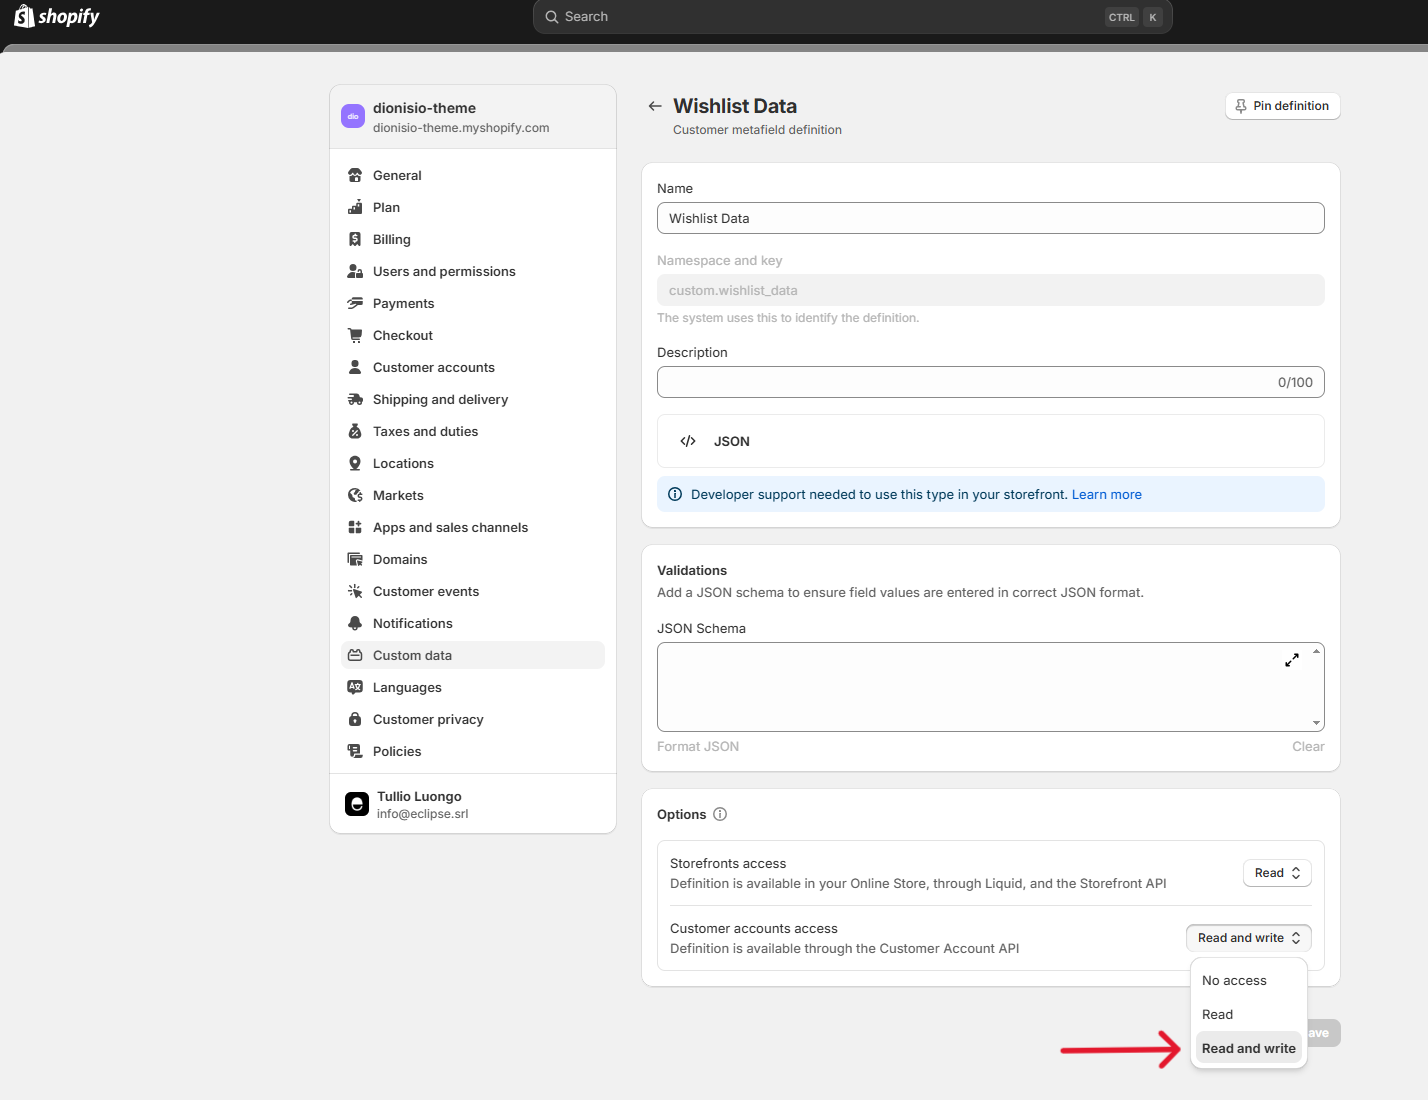
Set the metafield as writable
When you activate the Wishlist add-on, a 'Wishlist Data' metafield is automatically added to your customers in Shopify. To ensure proper functionality, go to your Shopify Dashboard > Settings > Custom Data > Customers. Find the 'Wishlist Data' metafield definition and set 'Customer accounts access' to 'Read and write'.
How to Setup [Webflow]
Copy the Wishlist Toggle
A "wishlist toggle" refers to the interactive element that allows users to add or remove items from their online wishlist
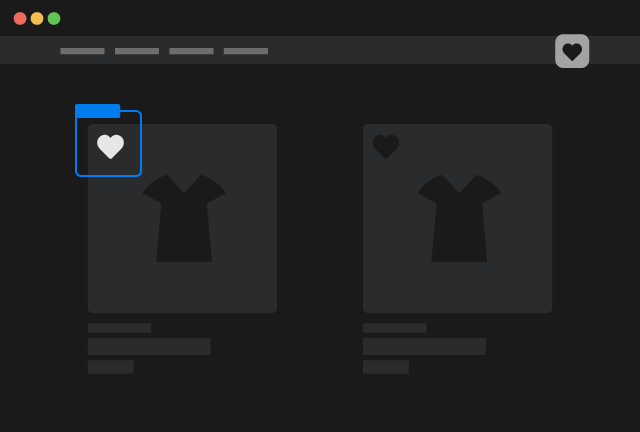
Wishlist toggle
Copy Element
The toggle can be added in any Product Custom Element.
The component is a simple Custom Element with tag wishlist-toggle and inside just an SVG embed.
The custom element will have the combo class is-in-wishlist when the product associated has been added to the wishlist. The svg custom embed you find in the component has the fill property set as currentColor so be sure to style the combo class in order to enhance your UX!
Create a Wishlist Listing
To display a customer's wishlisted items, create a dynamic product listing.
Add a Flex or Grid element
Design your flex/grid by keeping in mind that the replication of your product items will only occur on the live website, where your placeholder will be transformed into the full product listing.
Design the Product Template item
Copy and paste the Product Custom Element inside the flex/grid element you created.
Product Custom Element
Copy Element
Inside the Product Custom Element you can insert any static Webflow element.
For all the dynamic elements you can use inside the Product Custom Element with attributes or with other specific custom elements refer to the elements documentation
Add the data-id attribute
To retrieve the correct data from Shopify, add the necessary data-id attribute.
[Optional] Limit the number of products
By default the dynamic queries explained before will fetch 3 products. You can override this limit by adding another custom attribute to the Product Custom Element
E.g to fetch 10 products you can add:
Use Conditional visibility for the listing
To further enhance your design you can use 2 conditional visibility attributes
Has Items in Wishlist
Apply the following custom attribute on the element that you want to appear only and exclusively when there is at least 1 product in the wishlist
No Items in Wishlist
Apply the following custom attribute on the element that you want to appear only and exclusively when there are no products in the wishlist