Product Configurator
Create Formula-priced Products
Introducing the Product Configurator add-on, a powerful tool that transforms your product offerings by enabling complex, formula-driven pricing. Say goodbye to static prices and hello to a world of customizable, interactive products. This add-on empowers you to create products where the final price is calculated in real-time, based on a combination of user-selected options, quantities, and custom formulas. From simple checkboxes and dropdowns to intricate measurement inputs and mathematical expressions, you can build truly personalized and flexible pricing structures. Perfect for custom-built products, configurable services, or any scenario where the 3 option sets structure and add-ons simply doesn't cut it. This add-on opens up a new realm of possibilities, allowing you to create engaging and transparent shopping experiences that directly reflect the unique choices of your customers.
Server Plan
This Add-On requires the Server Plan. The server is necessary to create a draft order with price override
Activate add-on
This Add-On requires activation. You need to enable the add-on on the Smootify Dashboard of the site you are designing.
Dependencies
This Add-On requires Draft Orders add-on to be activated.
Configurator Inputs
Let's explore the various inputs you can use to tailor the pricing of your products within the "Add to Cart" element. We'll break down each input, examining how they can affect the final price.
Text / Textarea Input
This configurator input is the most generic one and can be used with any type of text input (like email, url, phone) and with textarea.
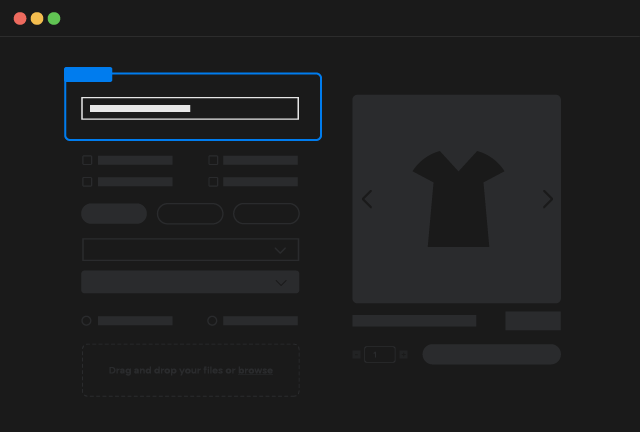
Product Configurator Input
Copy Element
One Input per Custom Element
This component supports only one input at time, if you require more configurator properties, just use multiple components
The element you can copy from this section is a Custom Element with tag configurator-input, inside it you will find:
- A label element that you can delete if not needed;
- An input of type text that you can modify according to your needs or replace with a Textarea;
- A Custom Element with tag
error-message, this element is just a small UX improvement to show up a custom message if your customers are trying to buy the button but the input is not correctly filled, you can delete it if not needed.
Price Formula
The price formula for this Input must be defined on the Custom Element configurator-input by using the attribute
data-formulayour formulaEnter your price calculation in the custom attribute value. You can use [price] and [length] as placeholder tokens in your formula for this input.
As an example, if you want to add a 1 (in the base currency so 1€ / 1$ / etc) surcharge when this input field is filled, you would use this formula:
[price] + 1
That as custom attribute will be
data-formula[price] + 1The [length] token can be used if you have a price instead that varies by the length of the input.
For example if you have a ring product with an optional engraving and you want to charge 30 cents for each letter you can use the formula:
[price] + 0.3 * [length]
That as custom attribute will be
data-formula[price] + 0.3 * [length]Checkbox
This configurator input will modify the price if the checkbox is checked
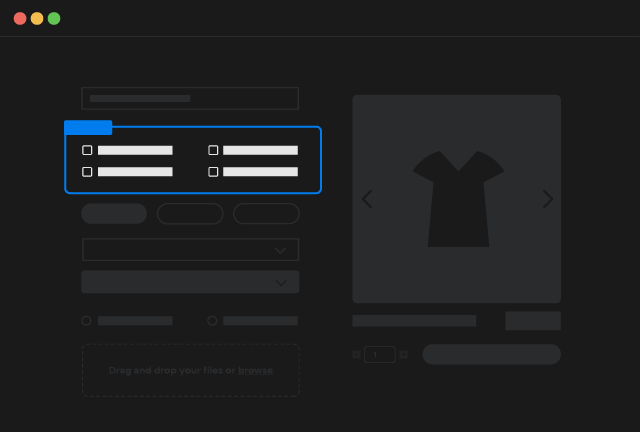
Product Configurator Checkbox
Copy Element
One Checkbox per Custom Element
This component supports only one checkbox at time, if you require more configurator properties, just use multiple components
The element you can copy from this section is a Custom Element with tag configurator-checkbox, inside it you will find:
- A label element that you can delete if not needed;
- A checkbox element;
Price Formula
The price formula for this Input must be defined on the Custom Element configurator-checkbox by using the attribute
data-formulayour formulaEnter your price calculation in the custom attribute value. You can use [price] as placeholder token in your formula for this input.
As an example, if you want to add a 1 (in the base currency so 1€ / 1$ / etc) surcharge when the checkbox is checked, you would use this formula:
[price] + 1
That as custom attribute will be
data-formula[price] + 1Dimension
Use this configurator input to create dynamic pricing based on user-entered dimensions. In this configurator input you can add all the number inputs you desire.
Perfect for products where price varies by area, volume, or similar measurements.
Product Configurator Dimension
Copy Element
Only Number Inputs
This component supports only number inputs.
The element you can copy from this section is a Custom Element with tag configurator-dimension, inside it you will find:
- A Label element that you can delete if not needed;
- 2 Divs with respectively:
- An input of type number that you can modify according to your needs (you should change Name, min and max attributes)
- A Custom Element with tag
error-message, this element is just a small UX improvement to show up a custom message if your customers are trying to buy the button but the input is not correctly filled, you can delete it if not needed. It will work only if it's set as the next sibling element of the input, if you move the position it will not work anymore
Price Formula
The price formula for this Input must be defined on the Custom Element configurator-dimension by using the attribute
data-formulayour formulaEnter your price calculation in the custom attribute value.
This input allows you to use [price] and dynamic placeholders in your price calculation. The placeholders, formatted as [{InputName}], represent the values entered in your number input fields. Simply replace {InputName} with the specific name you gave to each input.
Example
Let's say we're selling a rectangular item.
To calculate the price based on its area, we've created two number inputs: Length and Width that represent the length and width of the rectangle in meters.
Our product is priced 10€ per m2
So our formula would be
[price] + (10 * [Length] * [Width])
That as custom attribute will be
data-formula[price] + (10 * [Length] * [Width])Select
This configurator input will modify the price based on the selected value
Product Configurator Select
Copy Element
One Select per Custom Element
This component supports only one select at time, if you require more configurator properties, just use multiple components
The element you can copy from this section is a Custom Element with tag configurator-select, inside it you will find:
- A label element that you can delete if not needed;
- A select element;
Price Formula
The price formula for this Input is defined directly on the Select Choices Values. That need to be expressed in the following way:
Value|Formula
The Value is the effective value that your customer will see as property on the cart (and the store owner on the shopify dashboard), and Formula is the formula that will be applied if that specific choice is selected
You can use [price] as placeholder token in your formula for this input.
Example
We have a property on our product that has 3 different possible choices with respectively 3 different surcharges, in this case we would add the following choices in the webflow select:
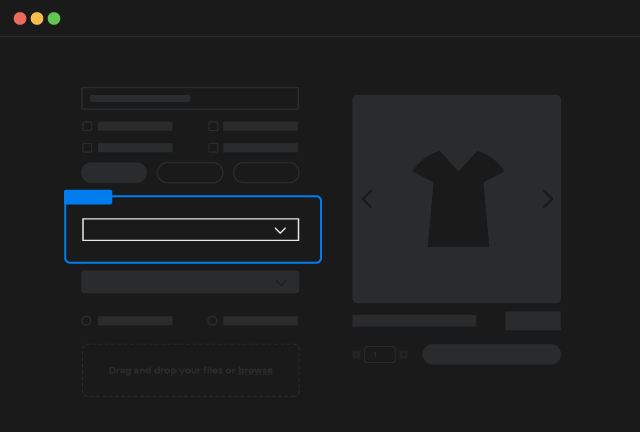
Option 1 (+ 1€)Option 1|[price] + 1Option 2 (+ 2€)Option 2|[price] + 2Option 3 (+ 5€)Option 3|[price] + 5Dropdown
This configurator input will modify the price based on the selected value, the only difference between this input and the previous one, is that this input will use a Dropdown element to control the Select input
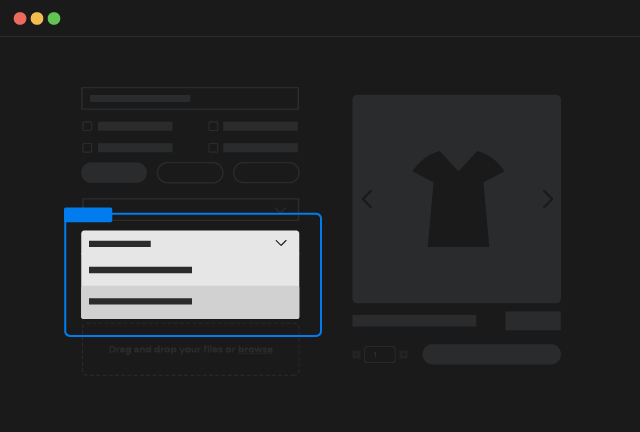
Product Configurator Dropdown
Copy Element
One Select per Custom Element
This component supports only one select at time, if you require more configurator properties, just use multiple components
The element you can copy from this section is a Custom Element with tag configurator-dropdown, inside it you will find:
- A label element that you can delete if not needed;
- A dropdown element;
- A select element, that will be hidden in the frontend, do not remove it, the dropdown will be dynamic based on this select values;
Price Formula
The price formula for this Input is defined directly on the Select Choices Values. That need to be expressed in the following way:
Value|Formula
The Value is the effective value that your customer will see as property on the cart (and the store owner on the shopify dashboard), and Formula is the formula that will be applied if that specific choice is selected
You can use [price] as placeholder token in your formula for this input.
Example
We have a property on our product that has 3 different possible choices with respectively 3 different surcharges, in this case we would add the following choices in the webflow select:
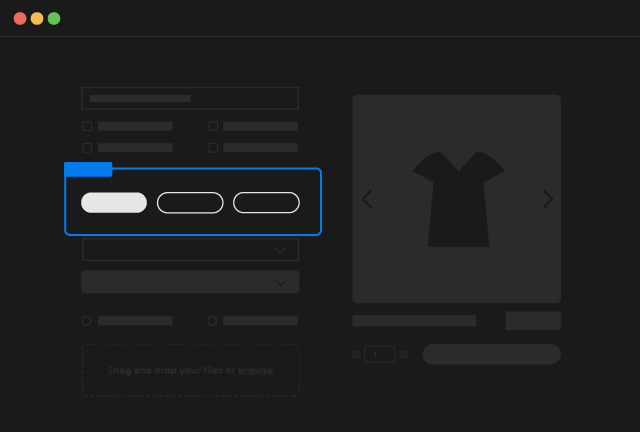
Option 1 (+ 1€)Option 1|[price] + 1Option 2 (+ 2€)Option 2|[price] + 2Option 3 (+ 5€)Option 3|[price] + 5Radio
This configurator input will modify the price based on the checked radio value
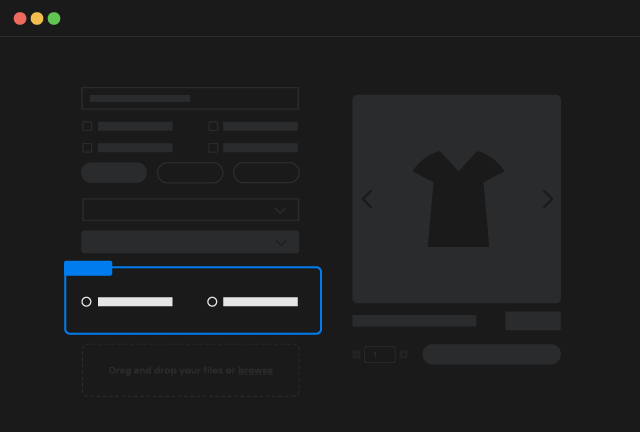
Product Configurator Radio
Copy Element
The element you can copy from this section is a Custom Element with tag configurator-radio, inside it you will find:
- A label element that you can delete if not needed;
- 3 Radio inputs that you have to customize based on your needs;
Price Formula
The price formula for this Input is defined directly on the Radio Choice Values. That need to be expressed in the following way:
Value|Formula
The Value is the effective value that your customer will see as property on the cart (and the store owner on the shopify dashboard), and Formula is the formula that will be applied if that specific choice is selected
You can use [price] as placeholder token in your formula for this input.
Example
We have a radio select on our product that has 3 different possible choices with respectively 3 different surcharges, in this case we would add the following choices in the webflow select:
Option 1|[price] + 1Option 2|[price] + 2Option 3|[price] + 3File Input
This configurator input will modify the price based on the uploaded files.
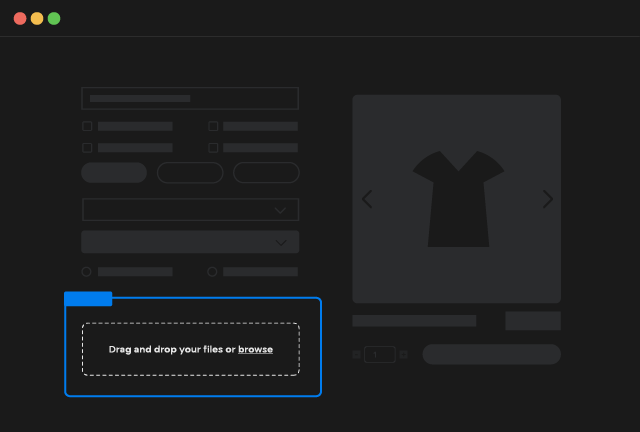
Product Configurator File Input
Copy Element
Price Formula
Enter your price calculation in the custom attribute value. You can use [price] and [file] as placeholder tokens in your formula for this input.
As an example, if you want to add a 1 (in the base currency so 1€ / 1$ / etc) surcharge when this input field is filled, you would use this formula:
[price] + 1
That as custom attribute will be
data-formula[price] + 1The [file] token can be used if you have a price instead that varies by how many files have been uploaded.
For example if you have a product where you want to charge 30 cents for each file you can use the formula:
[price] + 0.3 * [file]
That as custom attribute will be
data-formula[price] + 0.3 * [file]Options
You can configure the element by adding additional attributes explained below
Property Name
By default the Property will be created with name File, if you need to customize the name just use the attribute:
namename of the fieldMultiple Files
If you need to allow multiple files uploading you can use the attribute:
data-multiplenumber of max filesMin File Size
If you need to customize the minimuum file size required you can use the attribute:
min-file-sizesize stringfor example
min-file-size2MBWill set the minimuum allowed file size to 2MB
Max File Size
Max file size is 20MB and cannot be modified, since that is the limit imposed by Shopify
Min Resolution
If you need to customize the minimuum file image resolution required you can use the attribute:
min-resolutionmin resolution numberMax Resolution
Max resolution is 18.490.000 and cannot be modified, since that is the limit imposed by Shopify
Show Image Preview
If you want to see the preview image of the file just uploaded in the file input, you can use the attribute:
data-preview1Accept only images
By default the file uploader will accept all file types accepted by Shopify, if you want to accept only images you can add the attribute:
data-only-images1Quantity Breaks
If you want to have a different price based on quantities, you have to create a Component with the following utility:
paste the Component inside the quantity-input. It's just an hidden embed with a custom script that will inform the Product Configurator about the different Quantity Pricing breaks! (All without being forced to be on Shopify Plus)