Connect your project
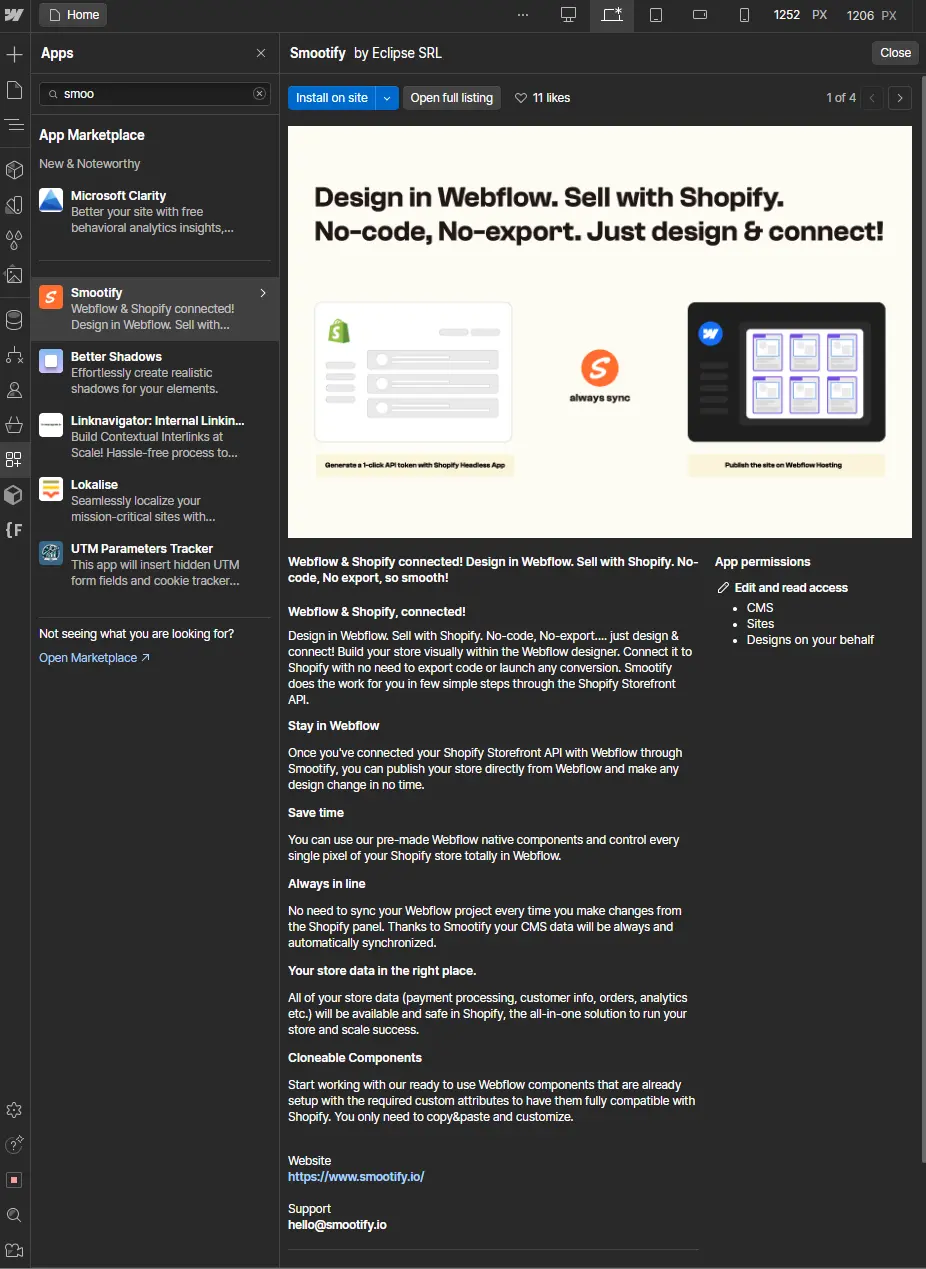
Connect Webflow and Shopify using Smootify
Starting from Shopify
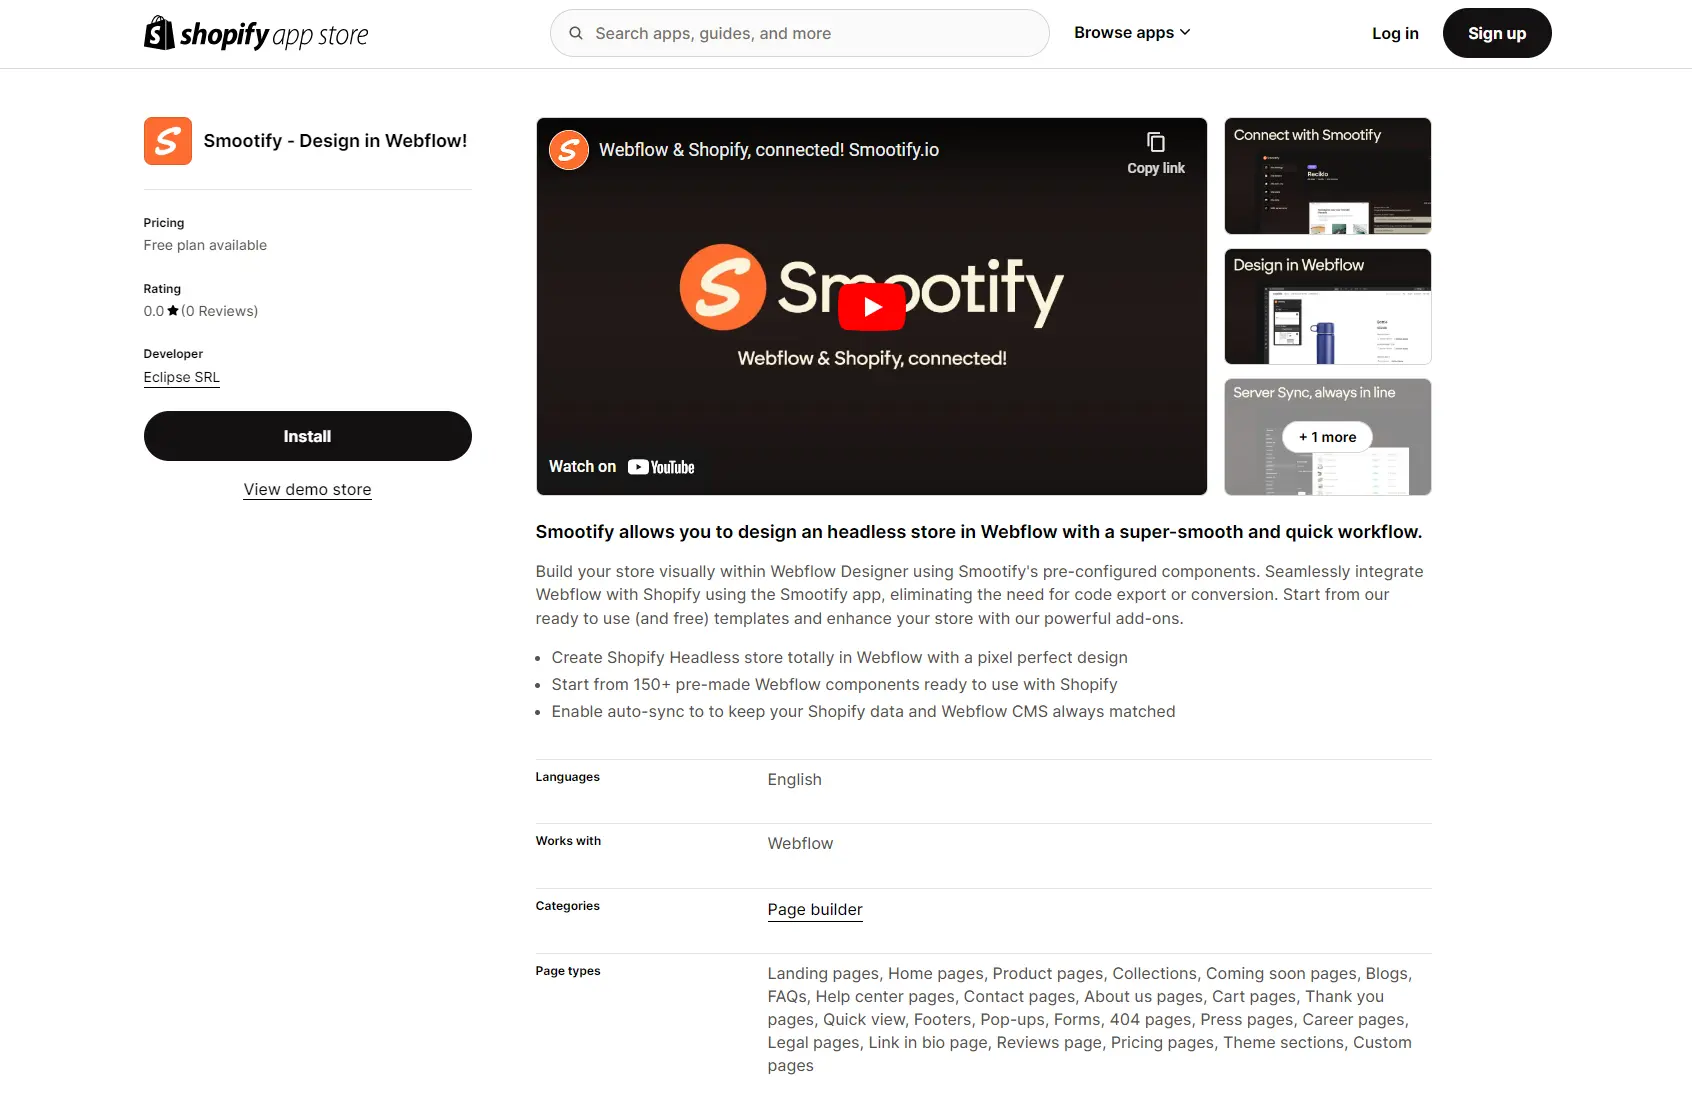
The fastest and easiest way to set up Smootify is to start with the Shopify app available on the Shopify App store.
Install the Shopify App
- Click on the Install button and select the Shopify store where you want to install the Smootify App.
-
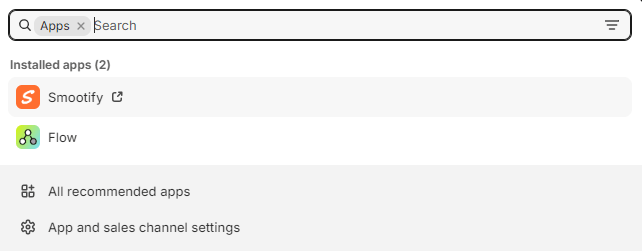
Once installed, launch the Smootify app from your Shopify admin panel.
-
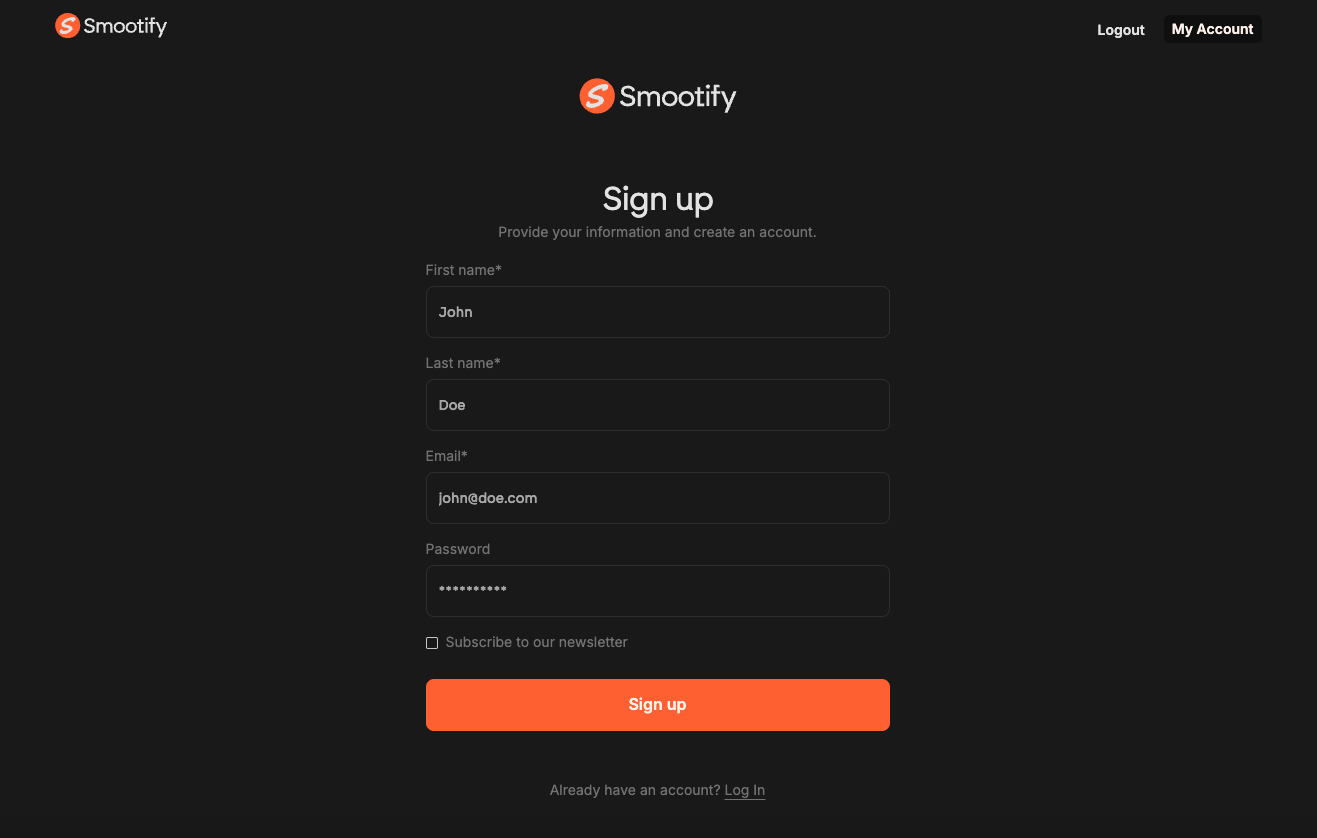
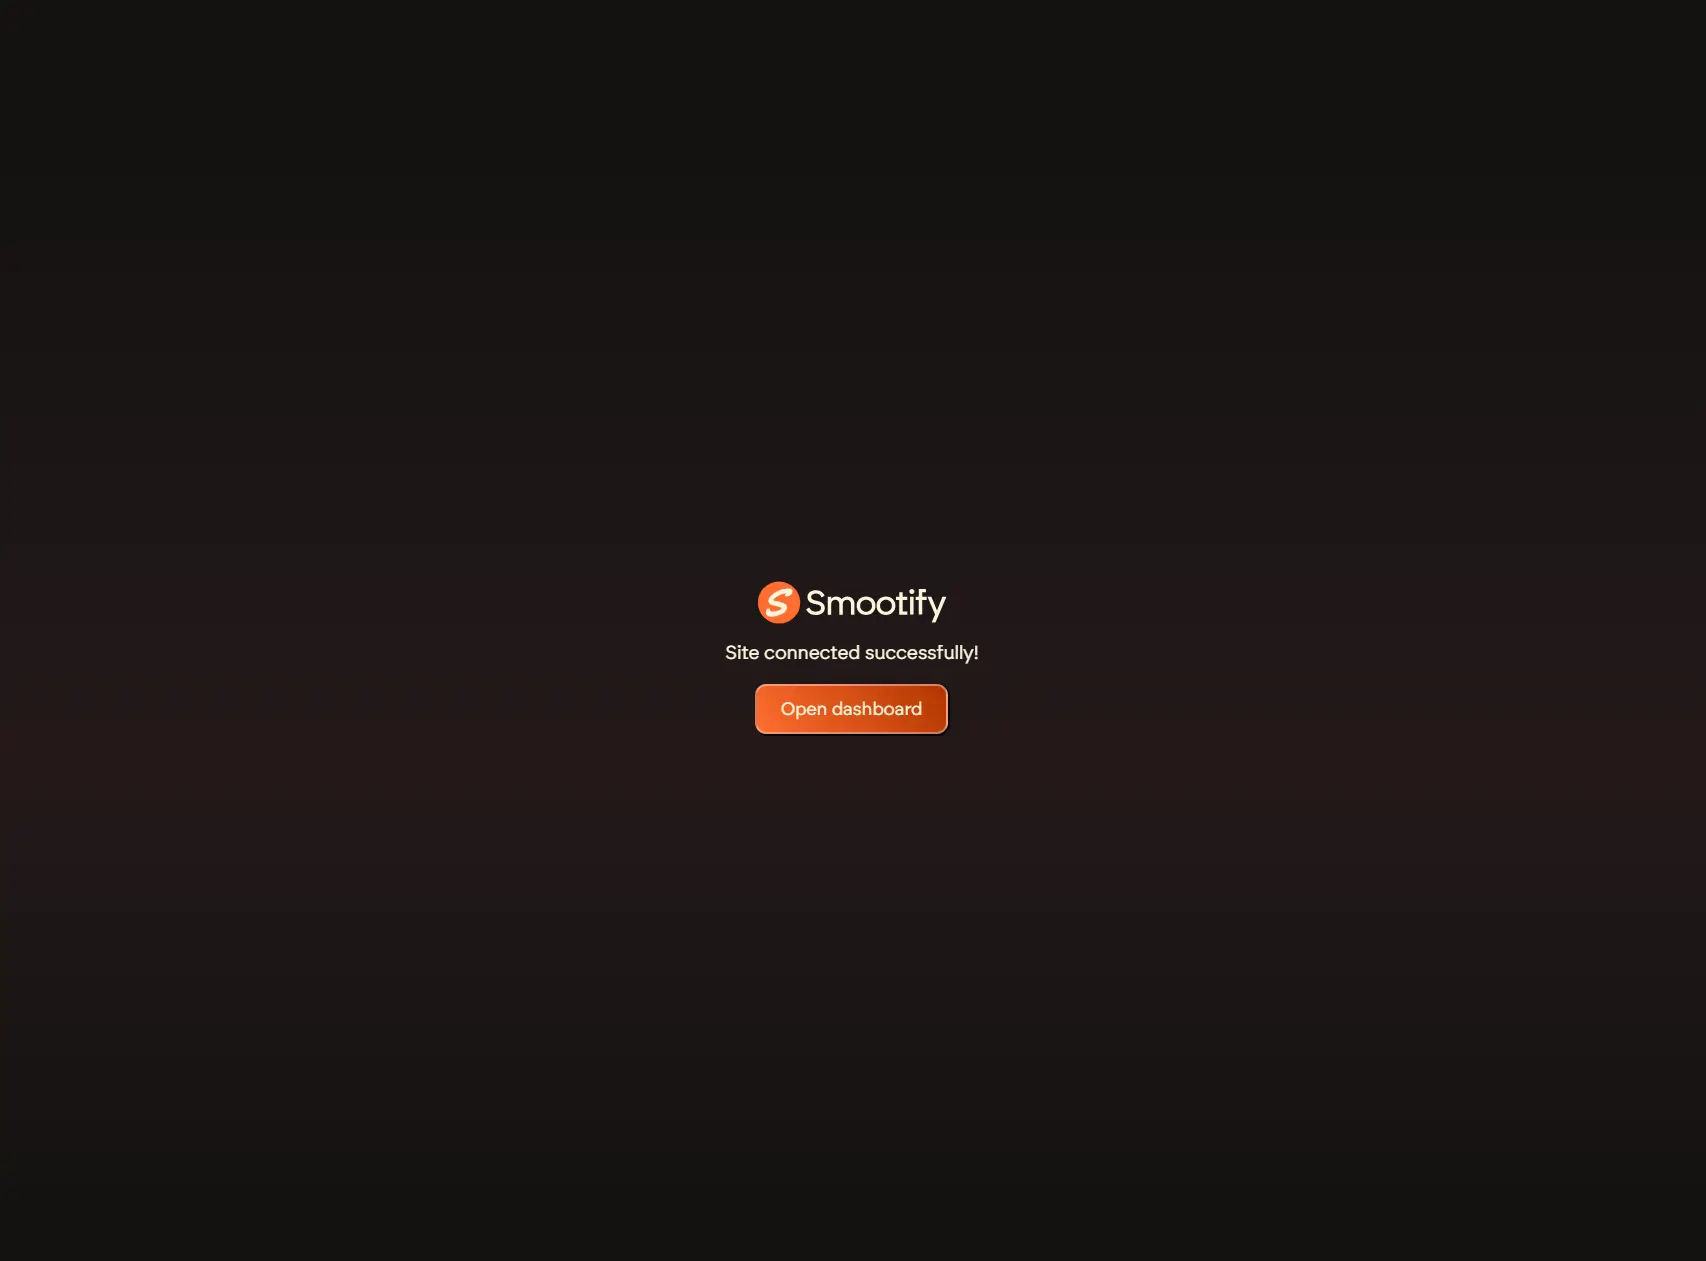
You'll be redirect to the Smootify dashboard. Login or create an account if you haven't already.
Connect to Webflow
- Once logged in you need to connect your Shopify store to Webflow. Click the Connect your Webflow site button and connect the Webflow project you want to use with Shopify.

-
If you're starting a new project from scratch, we highly recommend beginning with our new Starter Project v2.


The Smootify Starter Project comes with a comprehensive style guide featuring pre-built classes, plus:
-
Smootify Scripts Included: Seamlessly integrated into the global custom code section.
-
Shopify-Ready CMS: All the Webflow CMS collections feature pre-configured fields, primed for easy synchronization with your Shopify store.
-
Ready Pages: The starter project includes pre-built common pages—such as the cart page, search page, and product page—with their respective components already integrated and configured.
-
Component Library: A complete suite of components, logically organized by page function.
-
CSS Variables: Handy variables provided for styling key elements like the skeleton loader and the Cookie Consent Bar.
Once complete, you will be redirected to the Site Settings panel. Here, you'll find the Shopify Store URL and Public Token already populated. You only need to add your project domain. You can use your staging domain (webflow.io) initially and then replace it with your custom domain when ready.

- If you haven't used our Starter Project or the Smootify - Relume Starter Project, which already include the Smootify Script, please follow this additional step:
Navigate to the Smootify Scripts panel and copy and paste our provided script into the Webflow project settings > Custom Code > Head code section.


Starting from Webflow
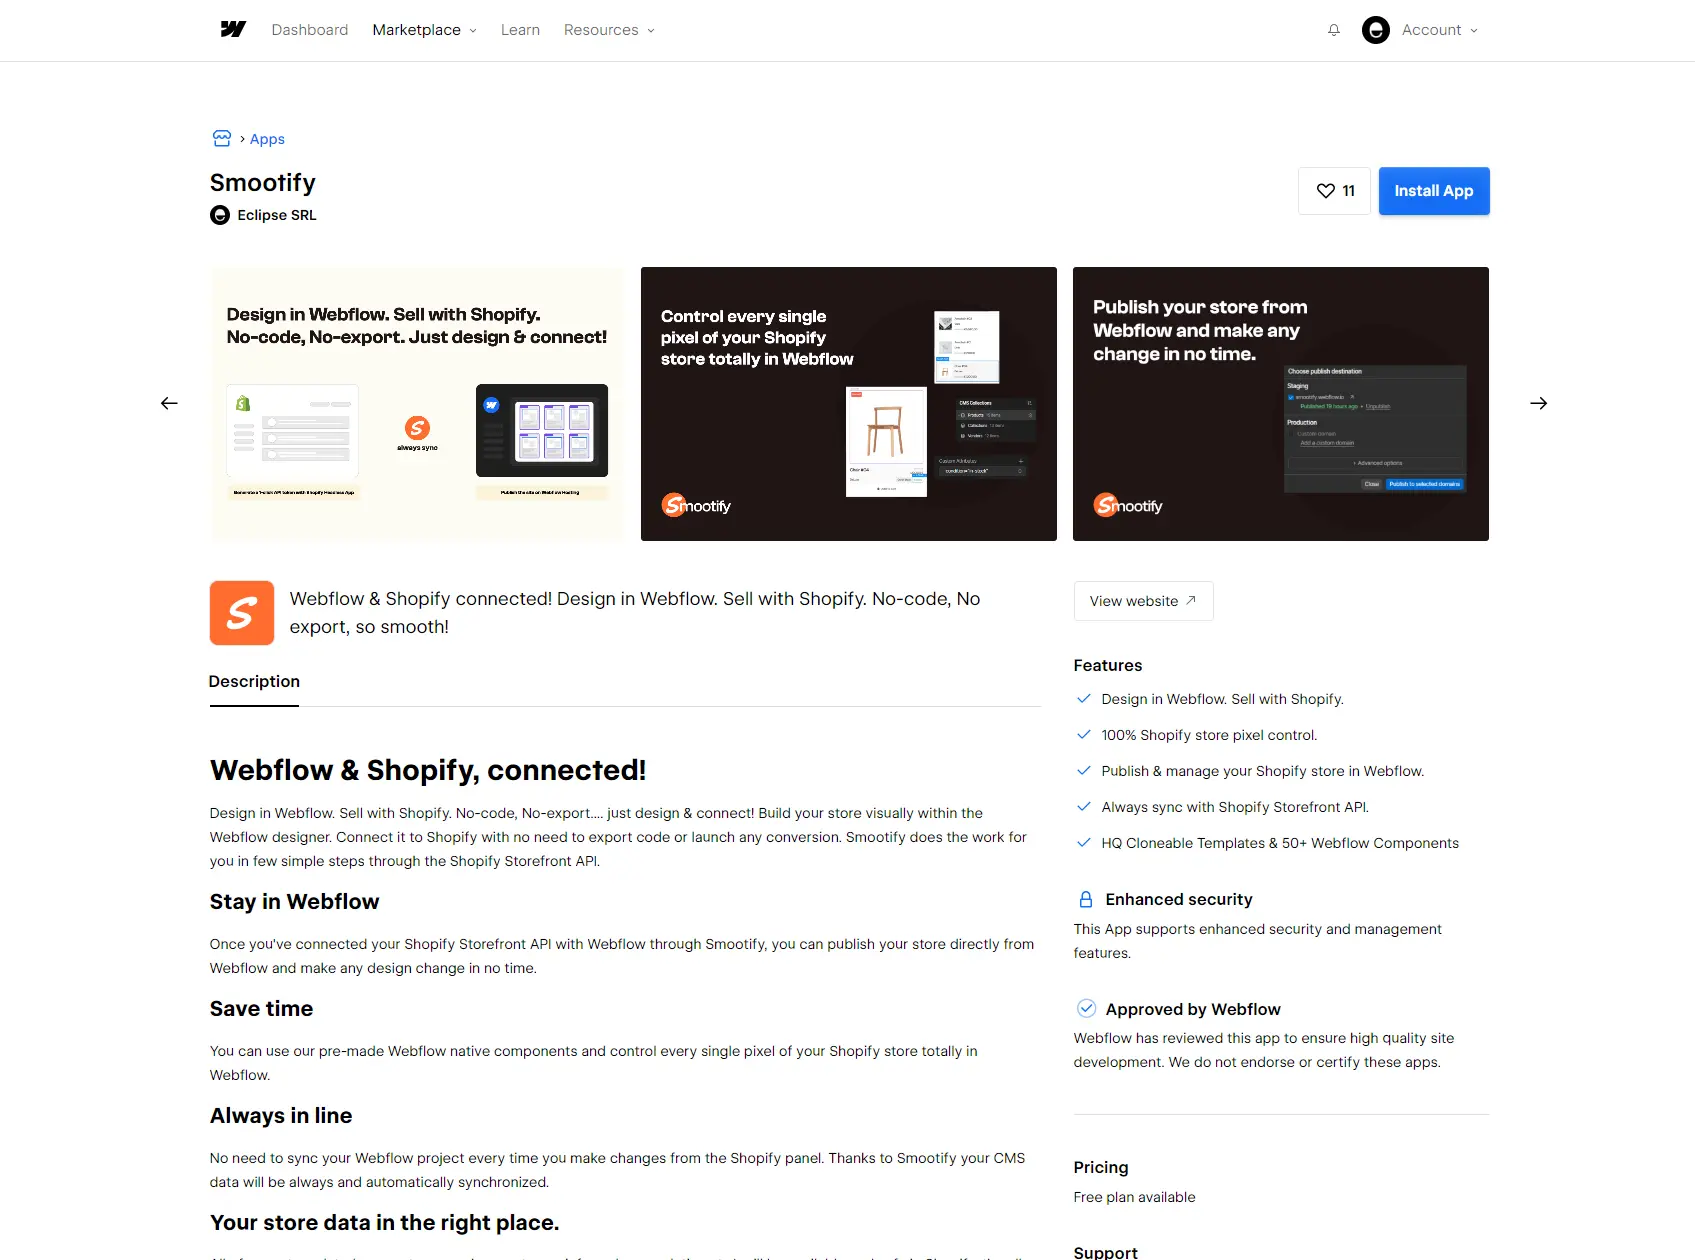
A viable alternative is to begin with the official Webflow application.
Install the Webflow App
From the Webflow Marketplace
From the Webflow Designer
Once launched, you'll see a message prompting you to login or signup to Smootify. Click the "Open Dashboard" button to access the Smootify Dashboard.

If you go to the newly added site settings, you'll see that the Shopify Store URL and Shopify Public Token are empty. To connect Shopify, simply install our Shopify App from the Shopify App Store and follow the instructions below.


Install the Shopify App
- Click on the Install button and select the Shopify store where you want to install the Smootify App.
- Once installed, launch the Smootify app from your Shopify admin panel.
Connect to Webflow
- You'll be redirect to the Smootify dashboard. Click the Connect your Webflow site button and connect the Webflow project you want to use with Shopify.
-
If you're starting a new project from scratch, we highly recommend beginning with our new Starter Project v2.
The Smootify Starter Project comes with a comprehensive style guide featuring pre-built classes, plus:
-
Smootify Scripts Included: Seamlessly integrated into the global custom code section.
-
Shopify-Ready CMS: All the Webflow CMS collections feature pre-configured fields, primed for easy synchronization with your Shopify store.
-
Ready Pages: The starter project includes pre-built common pages—such as the cart page, search page, and product page—with their respective components already integrated and configured.
-
Component Library: A complete suite of components, logically organized by page function.
-
CSS Variables: Handy variables provided for styling key elements like the skeleton loader and the Cookie Consent Bar.
-
Once complete, you will be redirected to the Site Settings panel. Here, you'll find the Shopify Store URL and Public Token already populated. You only need to add your project domain. You can use your staging domain (webflow.io) initially and then replace it with your custom domain when ready.
- If you haven't used our Starter Project or the Smootify - Relume Starter Project, which already include the Smootify Script, please follow this additional step:
Navigate to the Smootify Scripts panel and copy and paste our provided script into the Webflow project settings > Custom Code > Head code section.
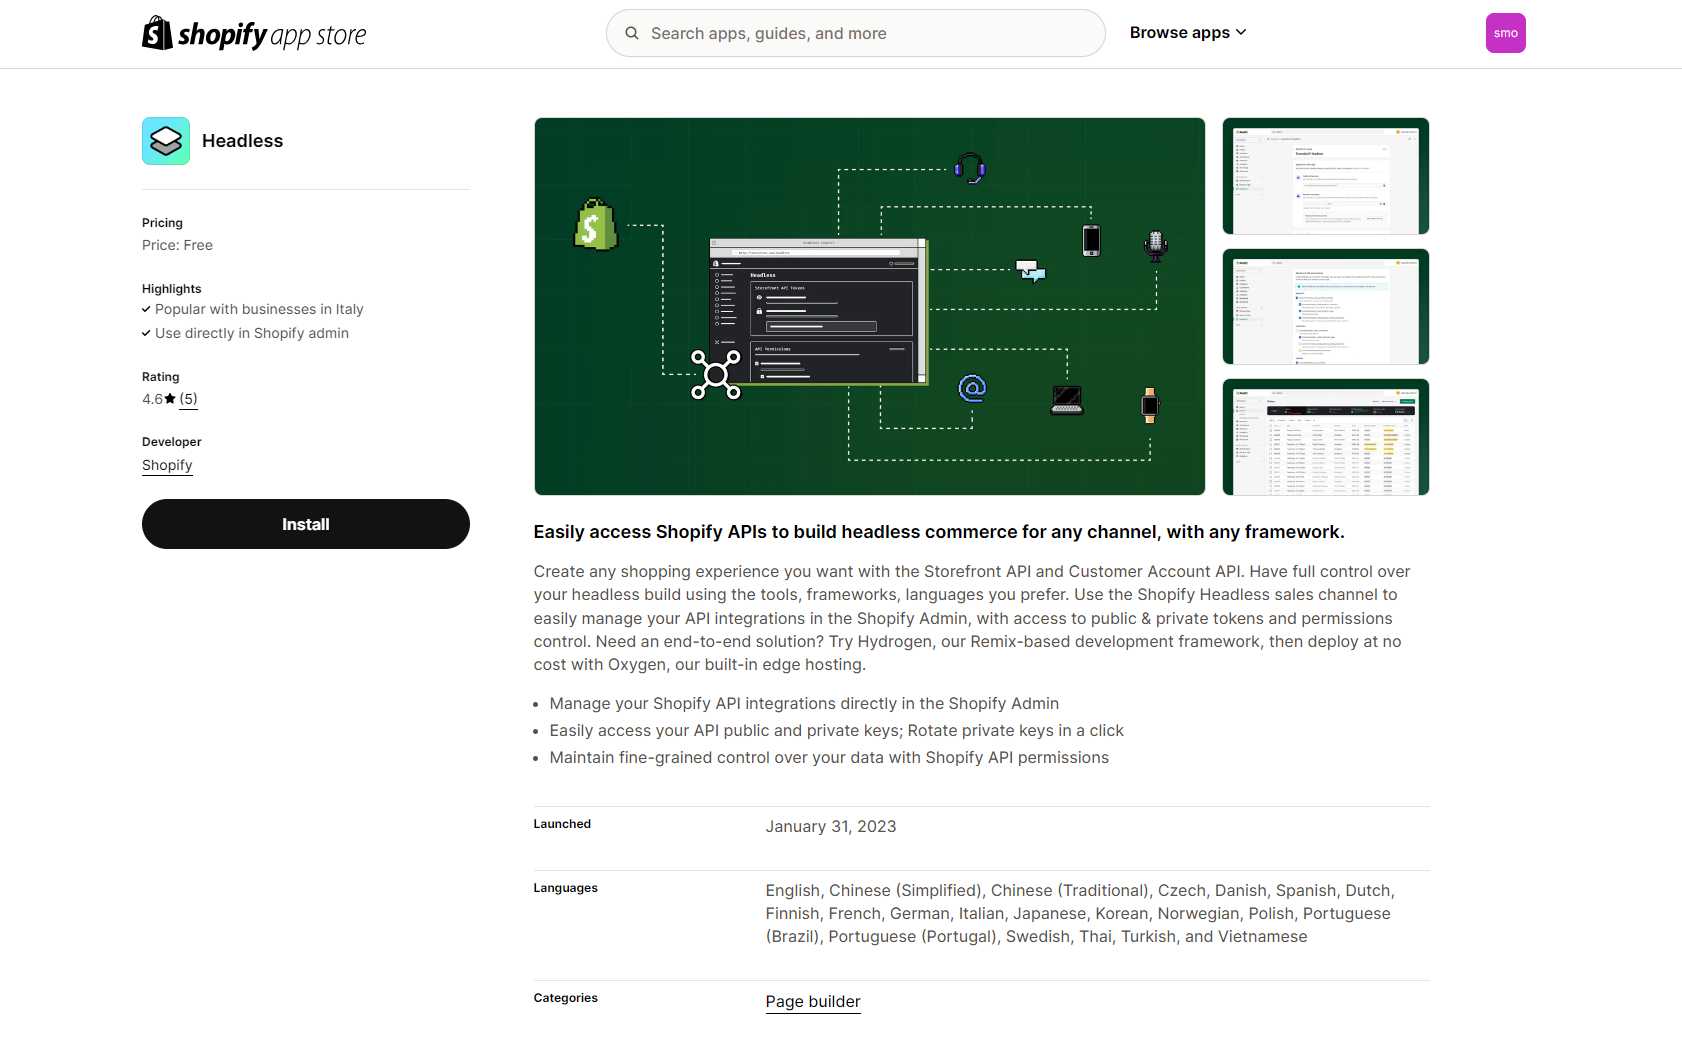
Install the Headless App
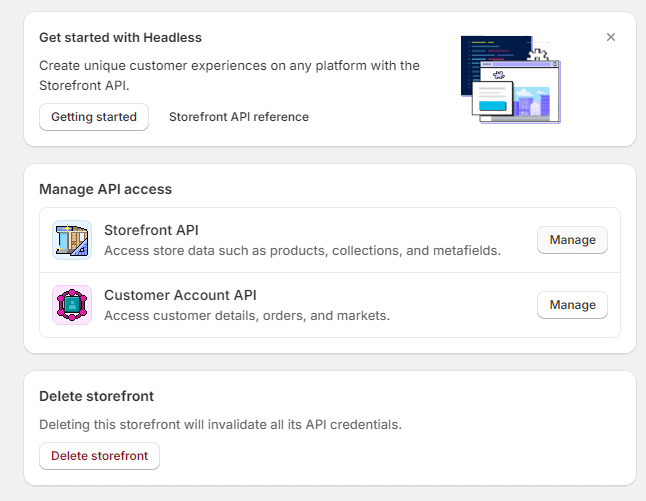
Whether you started from the Shopify app or the Webflow app, be sure to install and properly configure the Shopify Headless app to enable order confirmation emails, customer accounts, and other essential features.
- Don't forget to install the Shopify Headless App on the same store to enable order confirmation email, customer accounts and other functionalities.
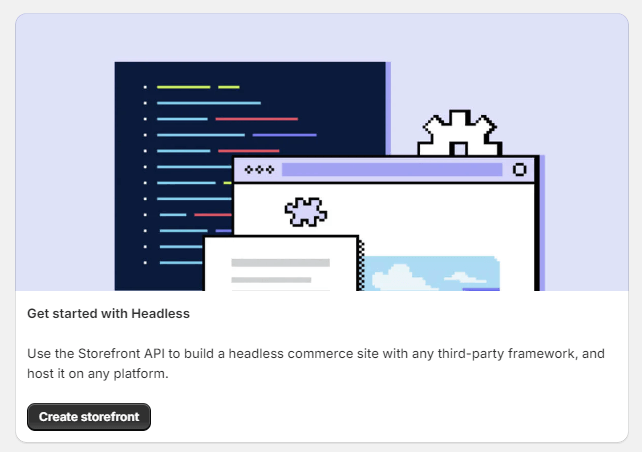
- Once installed, click the Create Storefront button.
- Then click on the Manage Storefront API button.
-
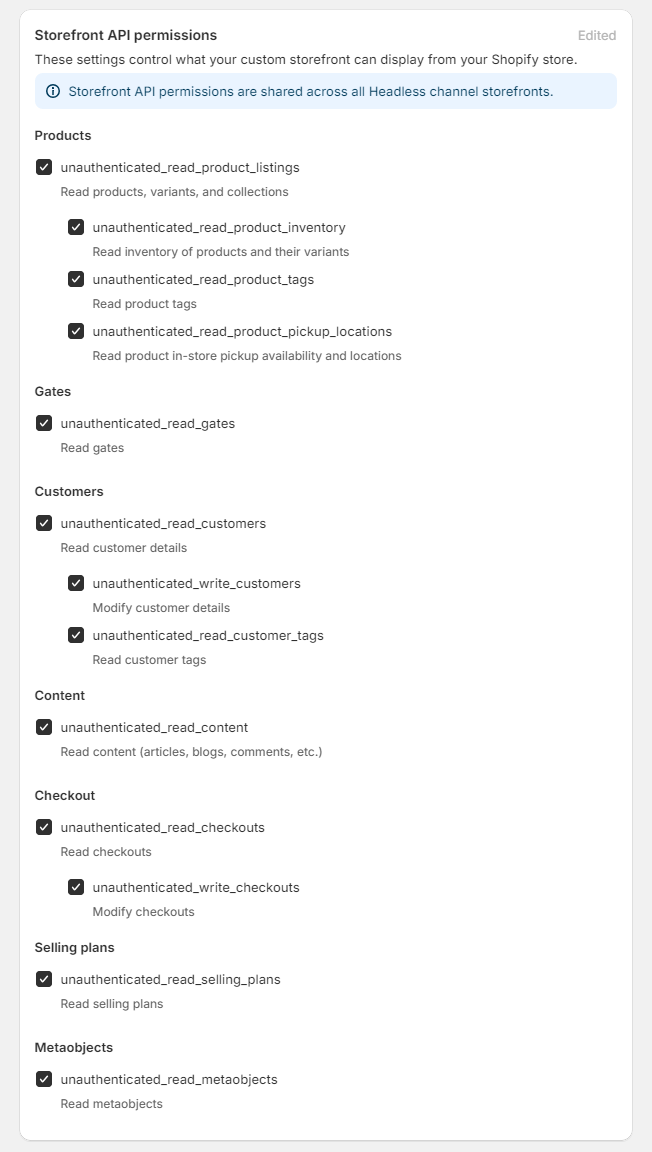
Click on edit and enable all the Storefront API permissions. Then click to Save changes.
-
Copy the public token and jump back to the Smootify dashboard.

- Go to Site settings into your dashboard and click on Edit Info button. Replace this new token with the existing one and click on Save Info.
